Sunday, July 09, 2006

Lesson 304, Still Life - Poms, Pears and a Nest


Two more examples of two Lowel EGO setups of nonreflective still lifes.

Further posts will be examples created in response to your questions, suggestions and comments. Fire away!

Lesson 303, Still Life - Sticks and Stones, no Bones


The task of the image maker is to evoke three dimensions in reality onto a two dimensional surface of media - be it onto web, print, moving film or video. Having said that, here are some sticks and stones photographed as "flat" and 2D as we can make them with an EGO - single EGO is positioned tight against the camera.

Lesson 302, Still Life - Coffee Pot


Again, the rounded light quality from the single EGO clearly shows up to enhance the mirrored metal surface of the subject.

Note that ALL photos on this blog can be clicked for an enlarged study of details.

Lesson 301, Still Life - Wine Glass and Bottle


As promised earlier, the "300" series would feature "art". And "art is in the eye of the beholder". We will start with five still lifes, which are more intented for "art" than commercial use, and will leave the question of "what is art?" for others.

The point to be made here is that the EGO configuration presents the subject, a wine glass and bottle first, with a clean and unobsturcted light source - and that the falloff of light values across the face of the EGO diffusor is from center to corner and this effects a lovely reflected highlight in the subject's glass and additional roundness on the imaged subject's other surfaces.

Lesson 204b, Squaring Off Flat Art


Yes, they're right - it's all done with smoke and mirrors. OK, no smoke.

The quickest way to square the camera to a piece of art is to position a mirror (without touching the fragile surface of a painting or other art work) FLAT (Critical!!) against the center (Critical!!) of the art and place the camera so that the center of the lens appears in the center of the mirror.

As with the example above, we have drawn an "X" from corner to corner on the mirror to help find the center of the mirror and visually find in the refection, the center of the lens.

In the example above, we have used blocks to get the center of the mirror up to the center of the art. With larger art, one may need attach the mirror to the center of a card of equal size to the art work.

Lesson 204, Digitizing "Flat" Art and Paintings


Two dimensional "flat" art such as a photographs or illustrations are probably most easily and quickly digitized with the use of a scanner - that is, up to the size of your scan bed. Larger photos and drawings can be easily digitize by a simple copy setup using two EGO lights as shown above and your digital camera.

The usual thinking is to center and cross light the art with each light source placed at about a 40 to 45 degree position in relation to the art on a copy board. Several important considerations:

NEUTRAL COPYBOARD- Copy board should be covered with a middle value neutral color such as middle grey so as not to influence the exposure and color balance.

COLOR CARDS- Again, reference to some known standard is important for reproduction or the understanding by the viewer.

SIZE- Rule of thumb is that the art should be equal or smaller than the light sources, but you can certainly sneak up to about 150% before the falloff of the light at the top and bottom become objectionable - so with 16 inch EGOs - to art work up to 24 inches tall - the width is not the problem. If the art is taller, then consider using four EGOs positioned to direct light across the four corners of the art - a post we will make later on.

PAINTINGS - Paintings, also considered "flat art", are more 3D with additional qualities of texture or gloss that the artist would like revealed or suppressed. You may need to add a white card to show up a gloss area or a piece of black velvet (or velvet paper) surrounding your camera position (cut much larger than the art work) to kill a gloss area. Pushing the EGOs back to a 30 degree or less postion will deaden possible highlights of textured paintings.

SQUARING- You need to be dead straight on to the center of the flat art inorder to have four parallel sides - this one task can take hours - see the next post for a easy solution.

Thursday, July 06, 2006

Lesson 203, Forensic Documents


Here is almost all that was left of a young Rocky Mountain sheep after two mountain lions had their feast at about the 10,000 foot level this spring on the south facing (warm) slope of the 12,000 ft mountain to the north of Silver Plume - this portion of skull and a thick layer of fur and blood laid out across an old mining road.

The EGO is a perfect inexpensive illuminant (aka- task light) for forensic or museum study and imaging - high color (92+ CRI), 5000 degree Kelvin (daylight with equal red, green and blue) and no radiant heat (93% of the energy from Edison's tungsten is infrared [aka: heat]) to further destroy the object.

Again, as with the bread and ceramic photograph, we use two EGOs - top/back boomed and front fill self standing EGOs and color reference cards. But here note the many white cards to open up the shadows and further reduce contrast, yet not to eliminate the necessary texture/information of our skull.

Lesson 202, Making Bread, Baking Bread


The baker or the restauranteur need good attractive images to help sell their offerings. Here are some specialty loafs of bread by Silver Plume's own Sopp and Truscott Main Street bakery. Add a few not-too-subtle props and you have an nice food shot.

Again, the classic product formula - top/back EGO up on a boom/tripod with front fill EGO self standing on a table - as in the ceramic photo earlier.

Lesson 201, Making $$$ - EBay Ceramic


These "200" lesson series will consider "commercial" imaging to help sell or promote a product (as opposed to portraits [100 series] or "art" [300 series, yet to come]).

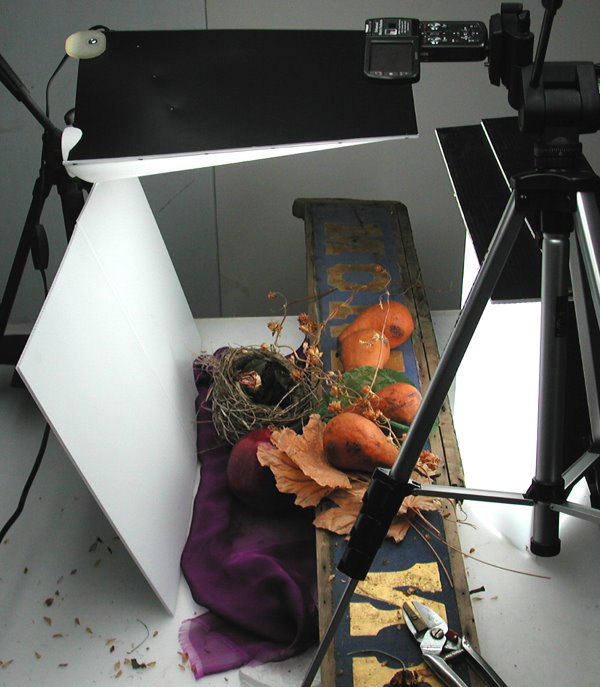
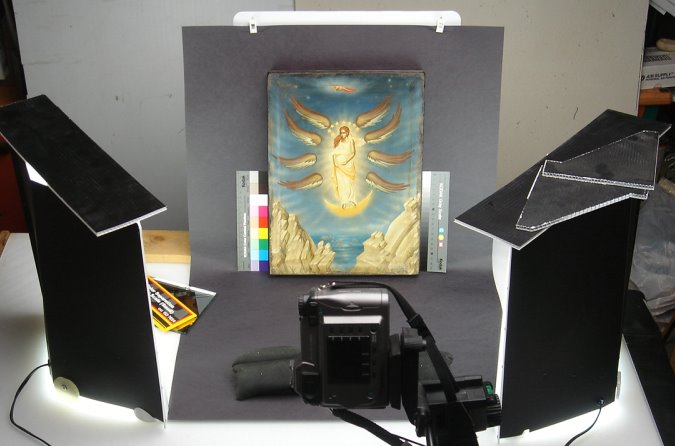
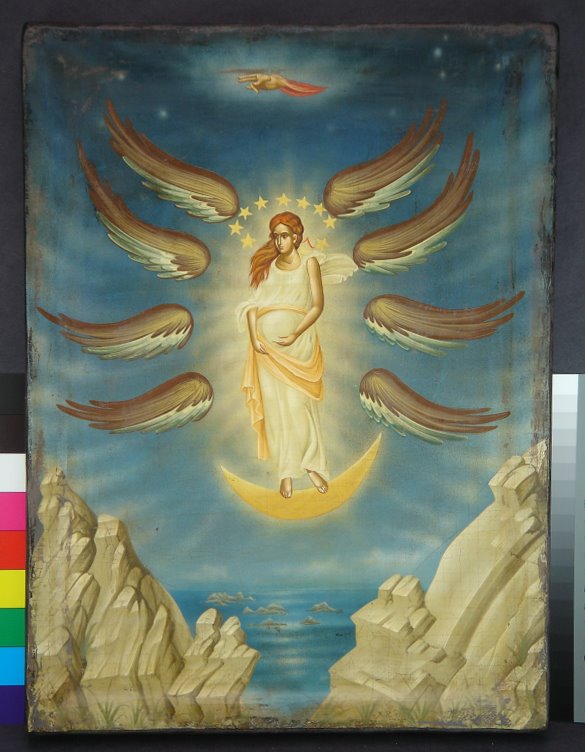
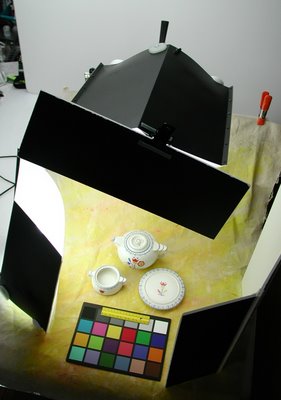
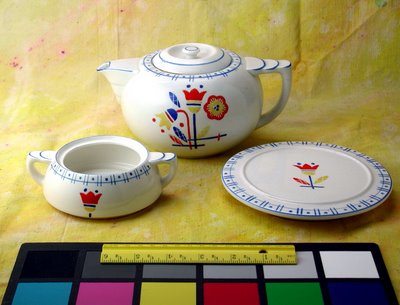
OK, we need to move the wife's (husband's) ceramic collection on EBay. Two light classic set up - one EGO overhead to create a top/backlight to show texture across the top of the subject. And a second EGO to the side of the camera postion to, again, show good texture and 3D roundness to the object's "face".

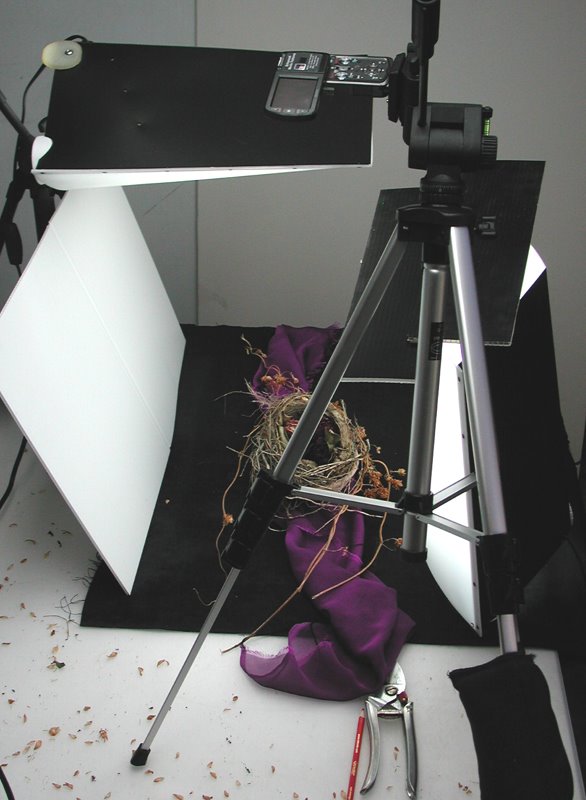
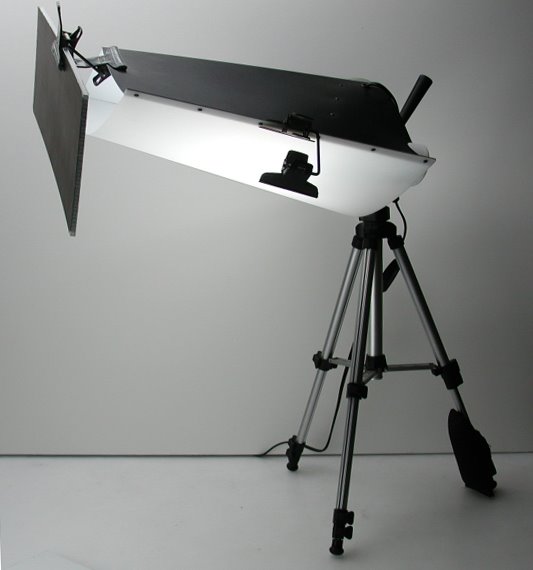
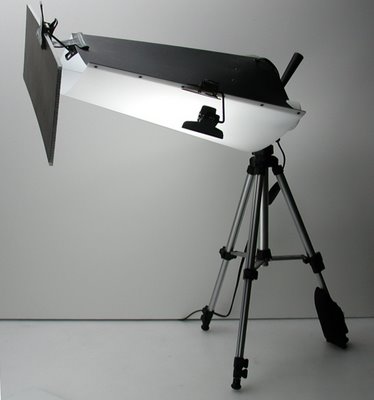
The third photo shows how to easily "boom" the EGO using a small tabletop tripod to create the "top/back" lighting - see that we weight the opposing leg with a small ankle weight that you can find in a gym supply.

Notes:
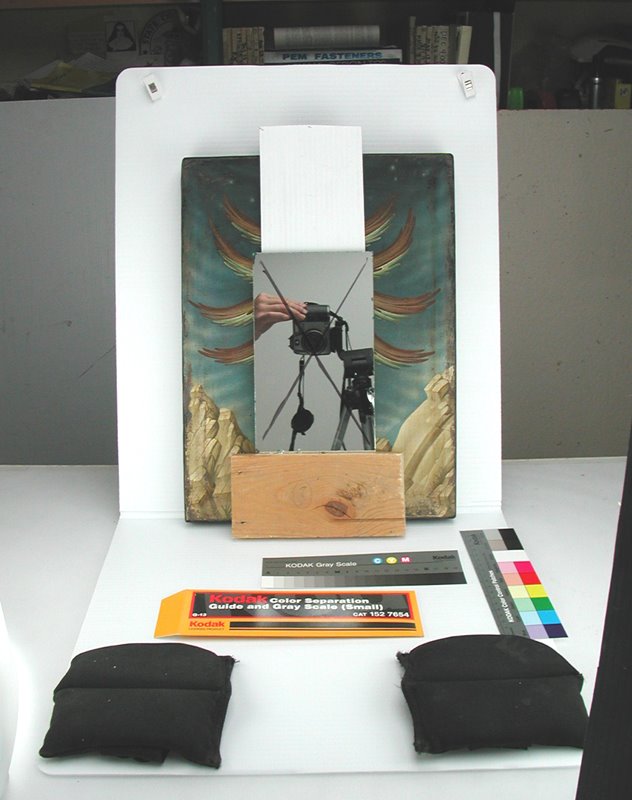
Color/gray card references - with any object or art work that is color critical for resale, include a color reference of some kind - the card shown in these blogs is a Macbeth (Munsell) ColorChecker Chart, about $80usd. A Kodak Color Separation Guide (cat 152 7654) is about $25usd. OR, at no cost, use any well known color object to give the web or print viewer some reference of any color inbalance - as example in the USA - Kodak yellow, CocaCola red, Morton Salt blue.

Size references - again, give the view some help with size as well as color, here a ruler, but can also be any known object or, perhaps a hand.

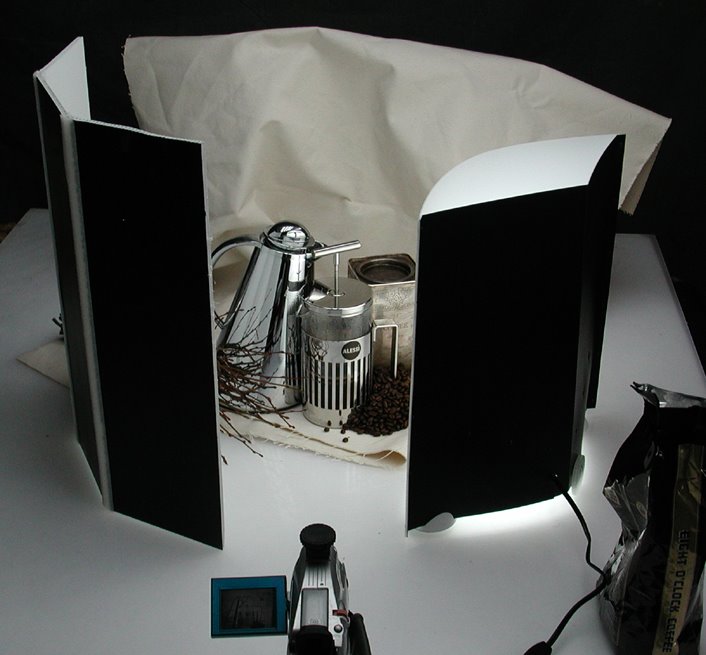
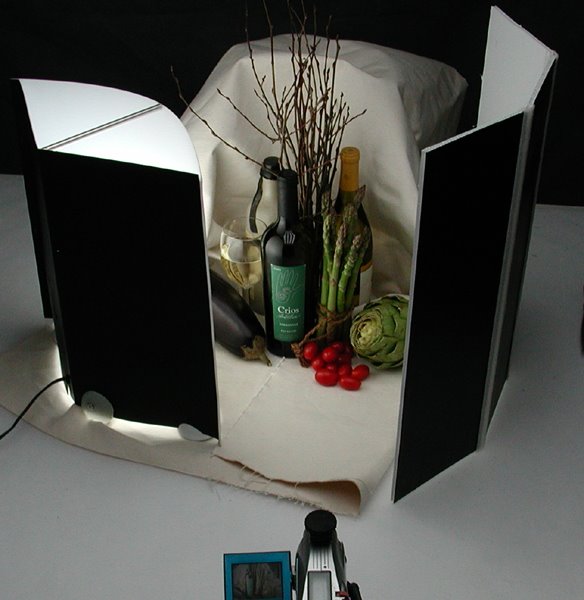
Clips and "barndoors" - always postion and block any light source from stiking the lens with black cards or black fabric.

Lesson 105, "Key" and "Fill" Portrait


Again we are using our two young models and our two young EGOs. "KEY/FILL" is the classic formula of portrait photographers (but there is no One Way! - Amen). The idea is that the "KEY" light (the light farthest to the left and closest to our subject in our set up photo) creates roundness and depth, aka 3D, in the subject, while his assistant, "Phil" (the EGO back at the camera) opens up the shadows and flattens the overall image.

So, two opposing ideas! - one light creates contrast or 3D and one light creates flatness or 2D- so that the two have to be balanced inorder to result in a smooth successful portrait. Easiest way to increase and decrease the light intensity is to move the lights towards or away from the subject. Remember your physics class, Lambert's Inverse Square Law states that you double the distances, the radiant body is one quarter the strength (or something like that). So closer, our KEY, the brighter. The farther, our "FILL", the dimmer - and the "falloff" is amazingly quick. Another way to reduce the brightness of the "FILL" EGO is to loosen (aka turn OFF) one of the two lamps. Note again the light foreground and reflector card to further reduce contrast and open the shadows.