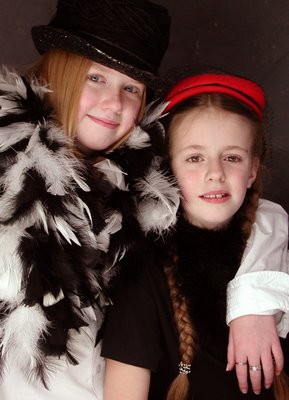

Again we are using our two young models and our two young EGOs. "KEY/FILL" is the classic formula of portrait photographers (but there is no One Way! - Amen). The idea is that the "KEY" light (the light farthest to the left and closest to our subject in our set up photo) creates roundness and depth, aka 3D, in the subject, while his assistant, "Phil" (the EGO back at the camera) opens up the shadows and flattens the overall image.
So, two opposing ideas! - one light creates contrast or 3D and one light creates flatness or 2D- so that the two have to be balanced inorder to result in a smooth successful portrait. Easiest way to increase and decrease the light intensity is to move the lights towards or away from the subject. Remember your physics class, Lambert's Inverse Square Law states that you double the distances, the radiant body is one quarter the strength (or something like that). So closer, our KEY, the brighter. The farther, our "FILL", the dimmer - and the "falloff" is amazingly quick. Another way to reduce the brightness of the "FILL" EGO is to loosen (aka turn OFF) one of the two lamps. Note again the light foreground and reflector card to further reduce contrast and open the shadows.
3 comments:
Works great -- if you can get the badly designed parts to align and assemble properly without falling apart every time you move them. Buy some extra duct tape or epoxy.
Dave,
"badly"?? - after two years of design efforts to make life as easy as possible - perhaps another look at the instruction sheet.
Dave-
I forwarded your comment to Marvin Seligman, owner of Lowel Light, who bankrolled the development and production of EGO. Marvin would very much like to have you go over your setup process inorder to improve the EGO instructional materials. Let me know your email address via my email shown under my profile or call him directly at 1718 921 0600
Post a Comment